
I finally reached D-Day (Departure-Day) and have been taking it easy the last few weeks. Easy as in not spending time on modelling activities, but more time on ‘Life’ things. But, since a few days, Autumn seems to have arrived, so a good time to warm-up the soldering iron to keep the man-cave warm.
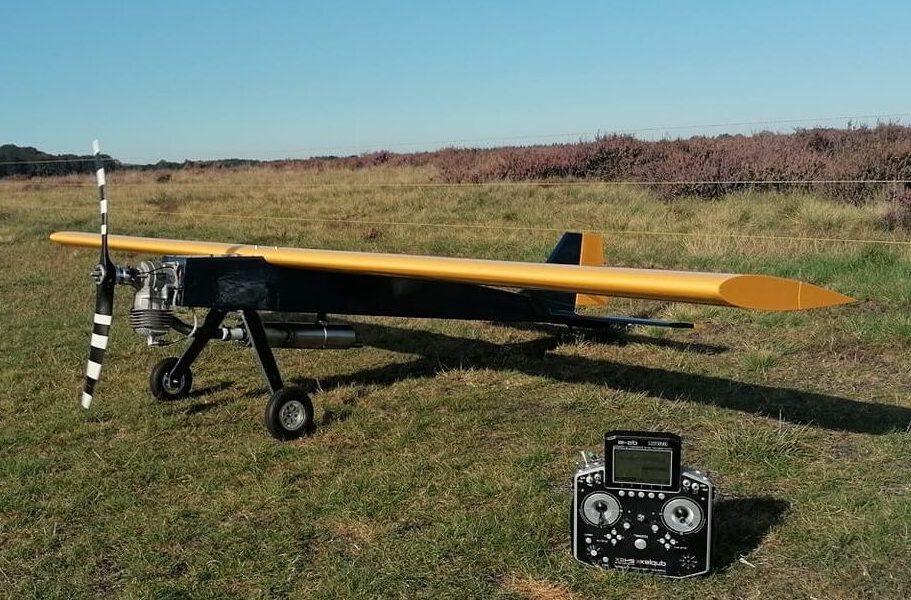
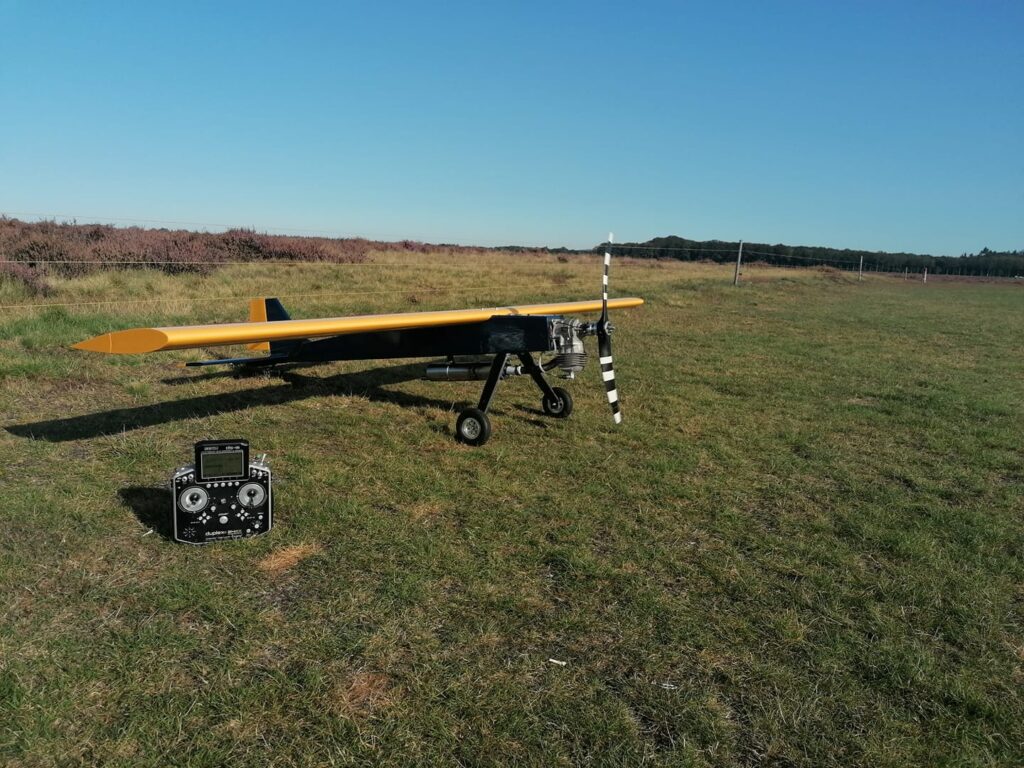
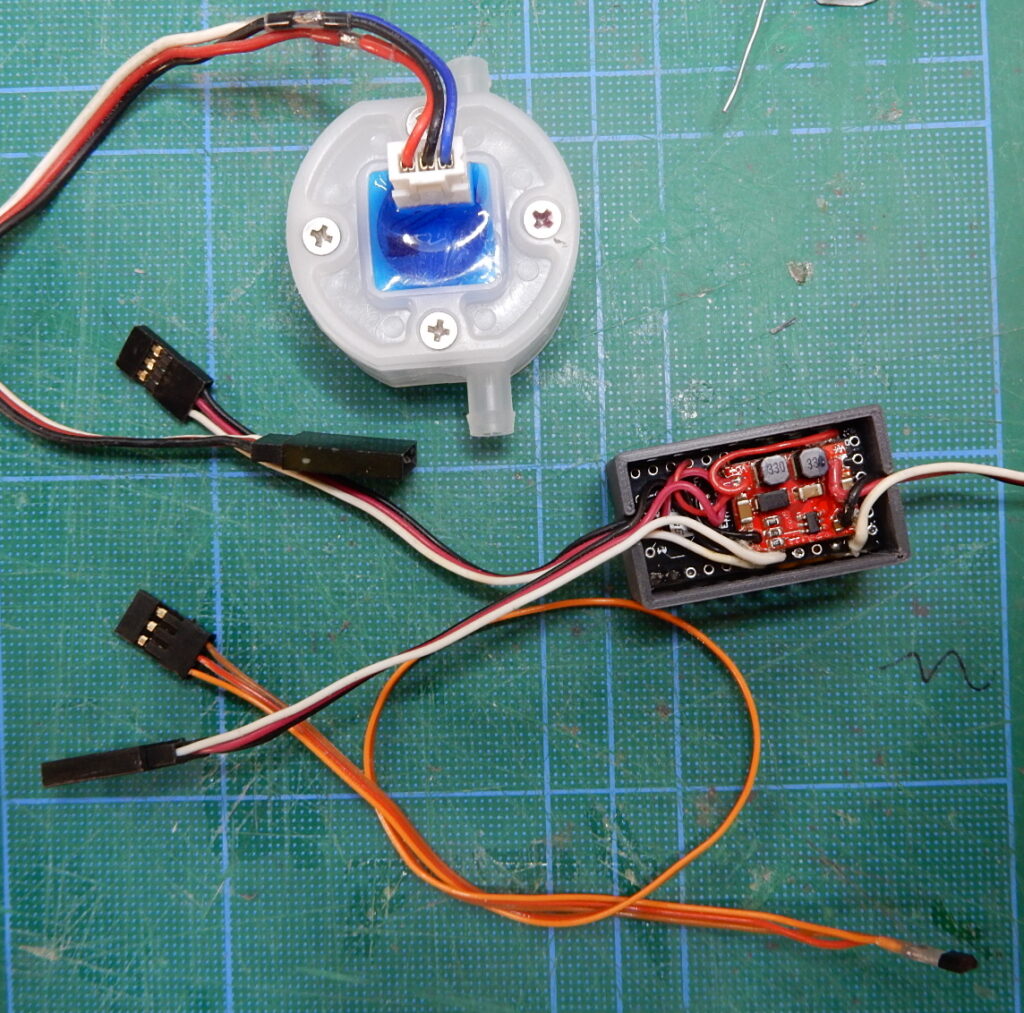
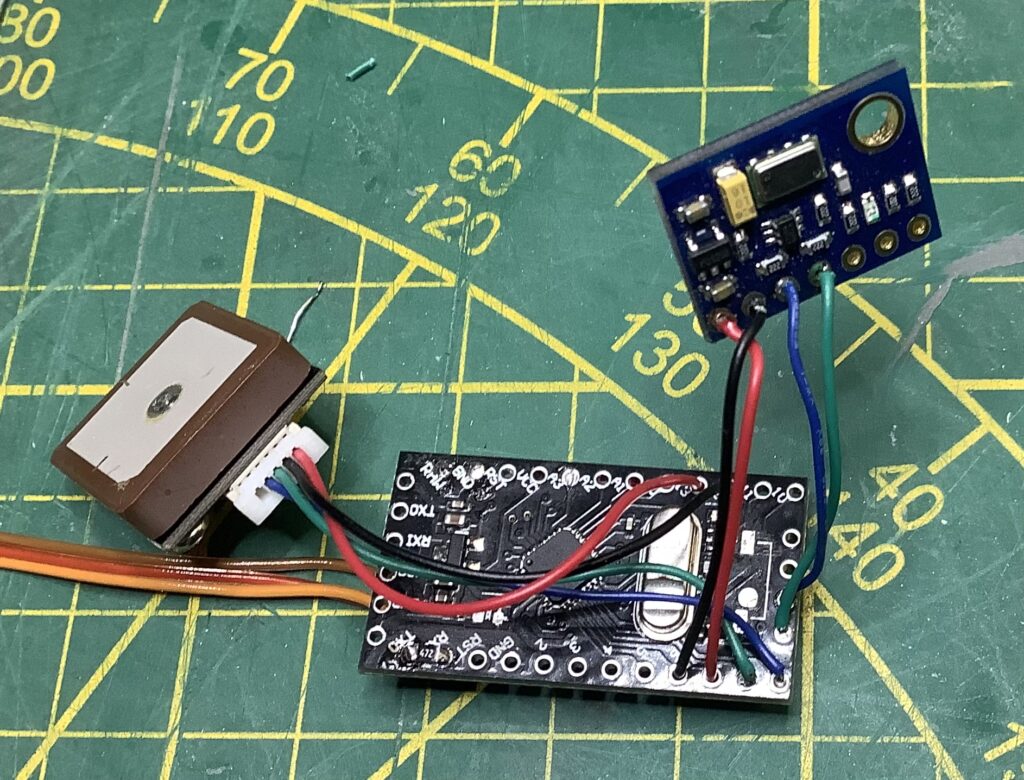
One of the things I needed to sort out was a flow meter for a Glider-Tug. Since a Flow-meter is just a lonely thing on it’s own, I decided to add a RPM sensor, and for good measure, a GPS. That makes it now a pretty good unit for Tow-planes.
Anyways, before you ask, I did not write the code to make it all work, just the usual tweaks to make it do what I want. Thanks goes to Thomas Lehmann for his excellent code.
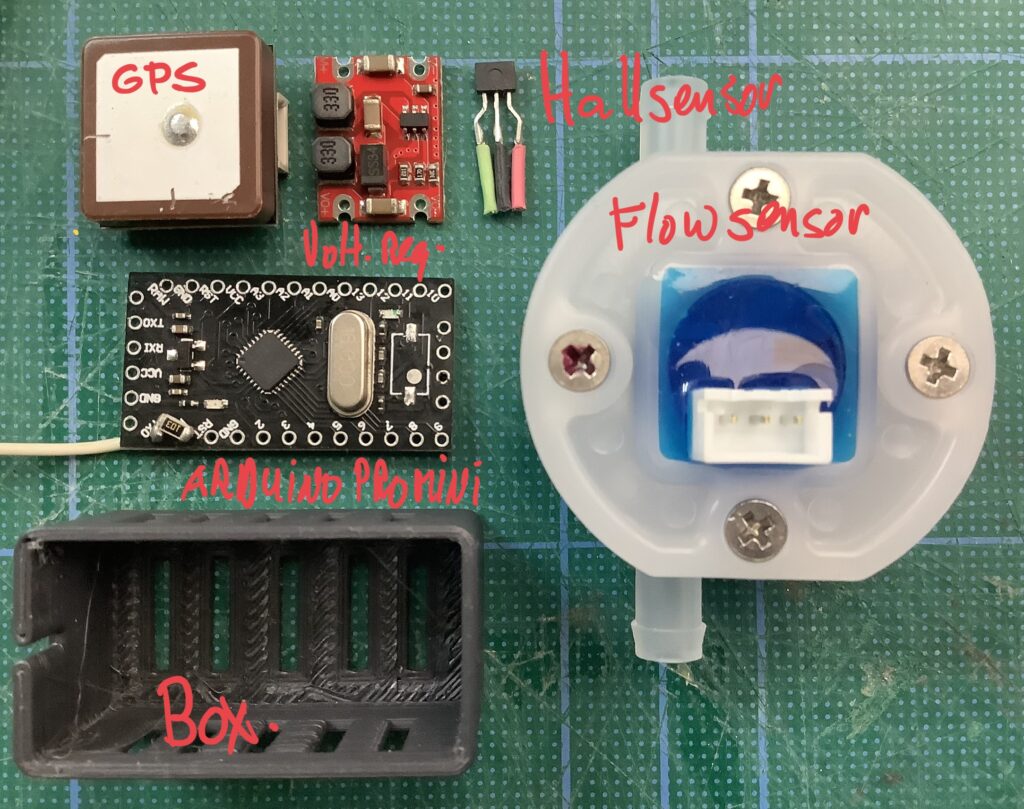
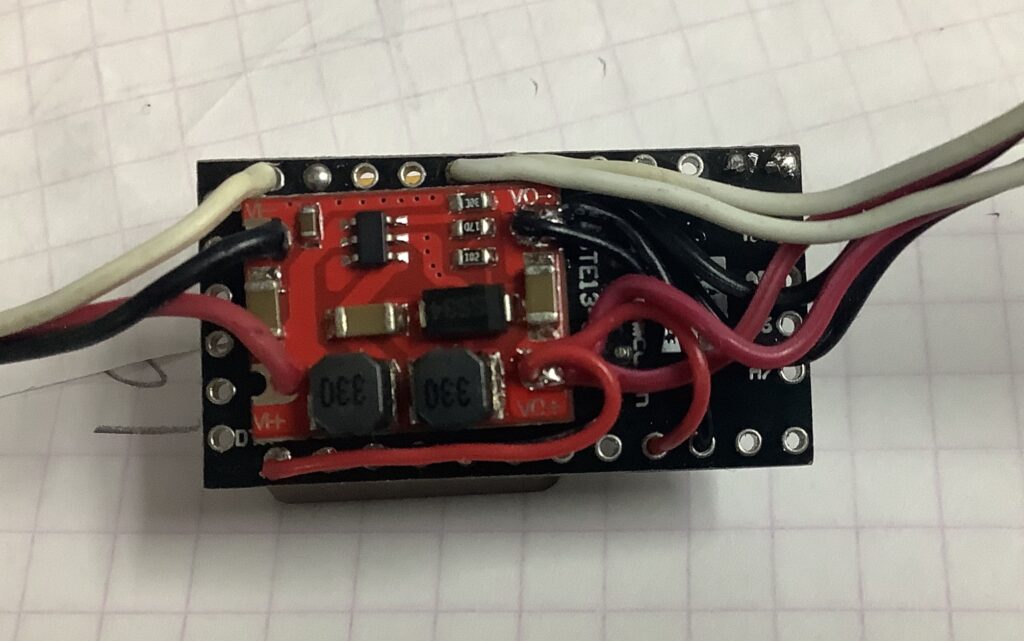
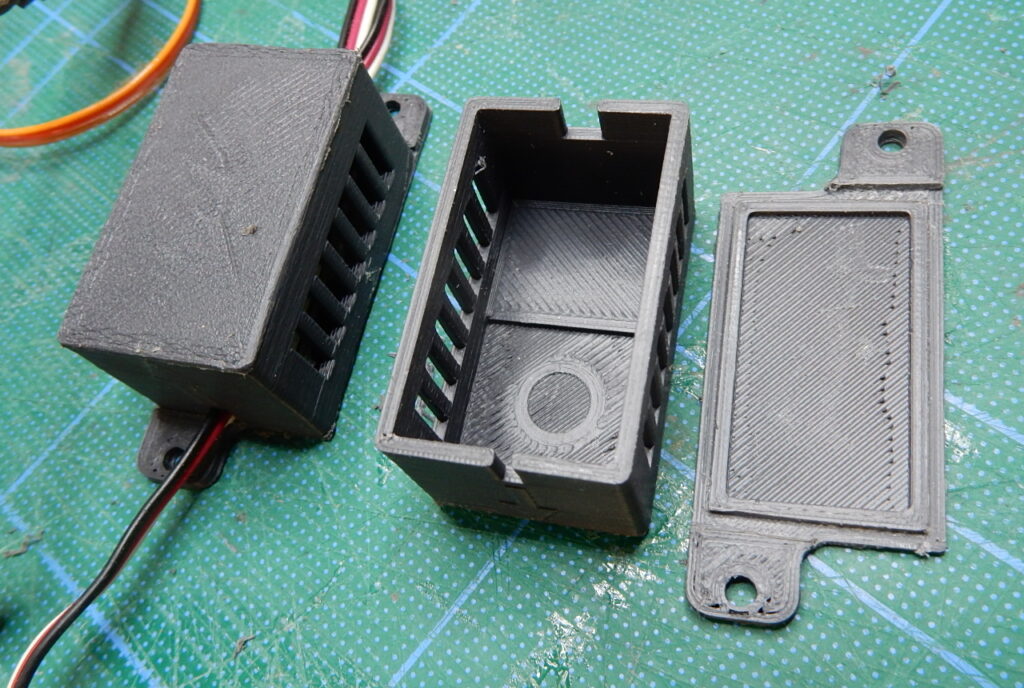
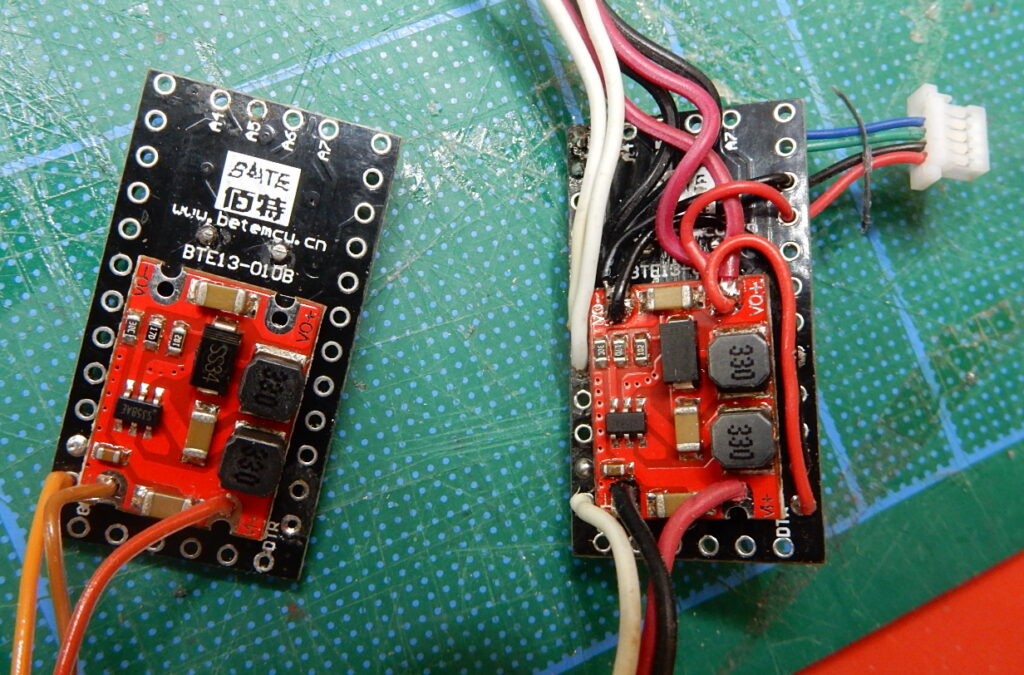
Which leaves me to glue a few parts together. One of the lessons learned is that you really need to have a decent stable 5 Volt supply on your Arduino. Which means you need to feed it from a regulator thingy. I did use step-down regulators in the past, but especially around 5V input things did not always work as designed. Anyway, long story, I found some Buck-Boost regulators, that allow a wider range of input voltage, while keeping the output where it has to be. (and yes, this one is slightly different form the advertised one. Did I say no 2 parts are the same? Anyway, it does the same trick, so all is good.)
One other Thing to keep in mind: most Arduino Pro Mini’s now are advertised as a ‘5V’ part. All it means is that the input voltage (VRaw) is supposed to be 5V. The onboard regulator drops that down to 3.3V (Vcc) . And when you then connect all your 5V sensors to the usual places, you can have a fair idea why things don’t work.

The Atmel328 on this board has 5V tolerant inputs, so it is safe to connect the RPM sensor directly to the input pins, same goes for the Flow meter. The flow meter also needs a minimum of 5V to operate.
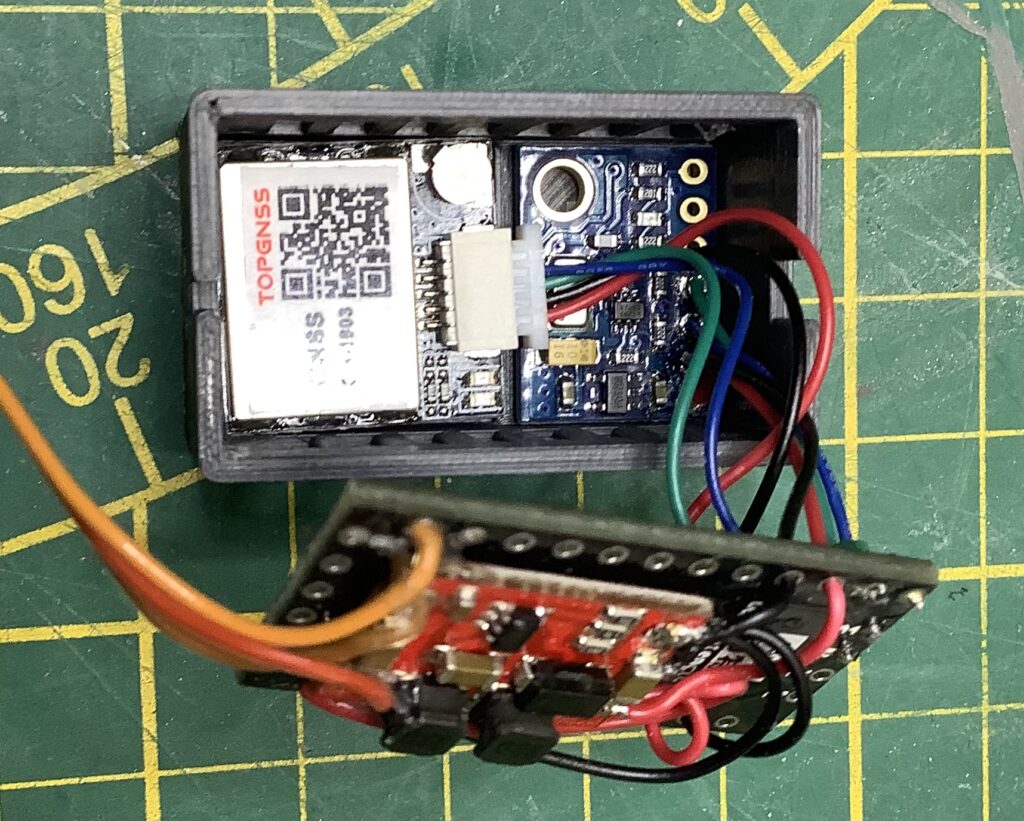
Just for fun I’m printing a new box, life would be boring if I used what I had already.
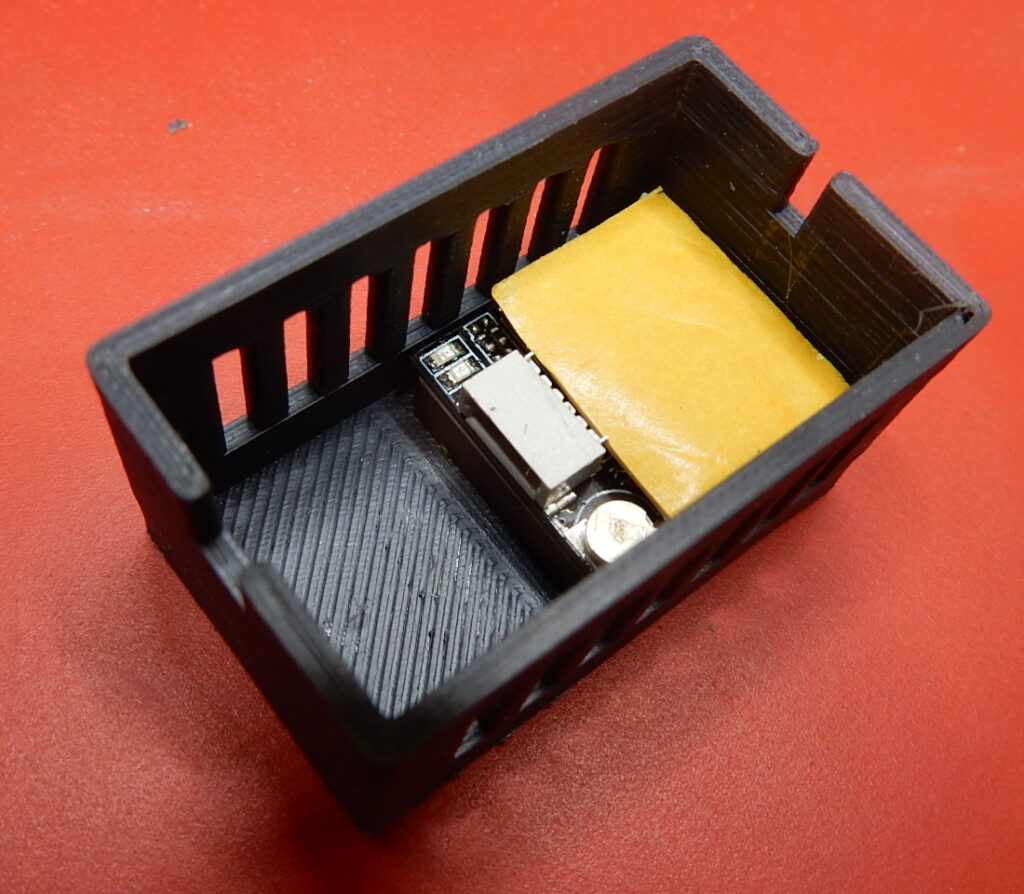
The only niggle I have at present is that the good people who sent me the flow-sensor, advertised it to include a connector. Someone must have borrowed it, because there ain’t none. I found an old 2S Lipo in my box of tricks and ‘borrowed’ it’s connector. Problem solved.
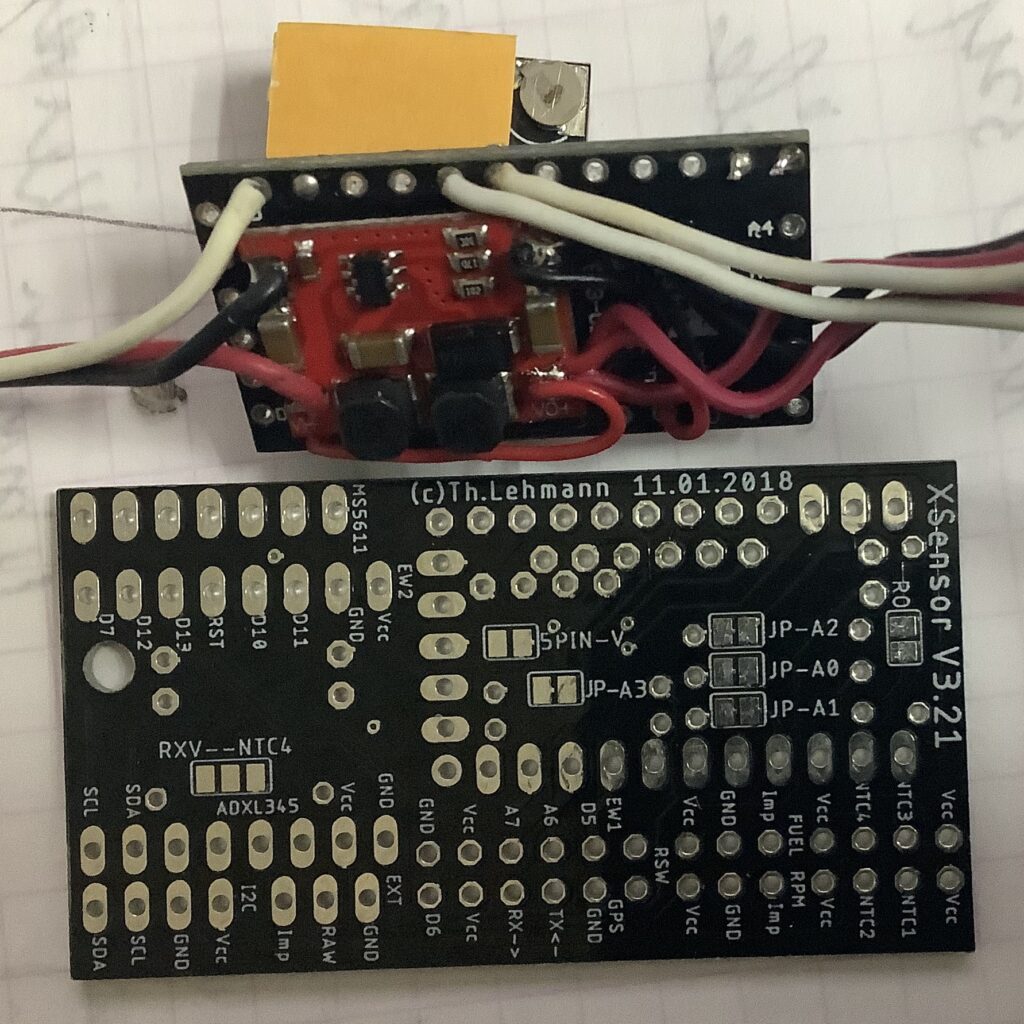
Next step, make some new PCB’s to replace the ones I got from Thomas. Those were designed for a slightly different Arduino. As with all these things, no 2 orders will give you the same parts. This is a general purpose board to which you can connect all the possible sensors that the software supports. Handy if you want to build 100 pcs, I don’t want to make that many! Given that the above assembly is so little work, the effort to make a new PCB is more for learning a new trick than anything else. As many times before, the software I used to work with is no longer available, it is replaced by something better.
All that’s left is to make the sensor cables, that should not take long.
Looking back a few posts make me think maybe I should add the airspeed sensor too. I did have some flights with it, but I need to get a much smoother display then I have at present. The sensor produces an analogue voltage, which fluctuates way too much. Filtering is needed, how much is a matter of mostly trial and repeat.
I’ll save that for the next one!
And see if I can make a totally optically isolated version. That would be handy too.
Next one after the next one. Maybe.
Do remember to change the MS5611.cpp in the linked library to fix the problem with MS5607 sensors! (for now, if I don’t get any more of these funny ones, I’ll let it be.) Or try to modify the main code to pick the modified library.
So, enough on this subject, time for something else!