Not much to add, just another leg..


Not much to add, just another leg..
The first leg is the easiest, the second has to match, which is far more work. However, I’m quite pleased with the weekends work. Total weight of the leg is 118 gram. I also added all the pilot seat tubing, giving a total fuse-weight of 1148 gram. (still hoping for a less then 2 kilo RTF fuse.)
I started with the main pipe, angled forward 8 degrees. Followed by the cross-way pipe to which the bungy-cord attaches. Next the support for that, so that the triangle is complete. Next the rear support to lower main leg. Then the bit between front and rear support, and finally the cross between rear and bungy-cord pipe.
Note to self: Need to make a 4+ mm bushing to fit snugly into the 5 mm fuse attachment tube. With a 4+ mm bushing and 3 mm bolt to secure the bushing, all will be perfect!
Closeups of my handywork. After sandblasting I ‘ll reheat the joints to make them flow a bit more and fill any voids leftover. This will be for cosmetical reasons only.
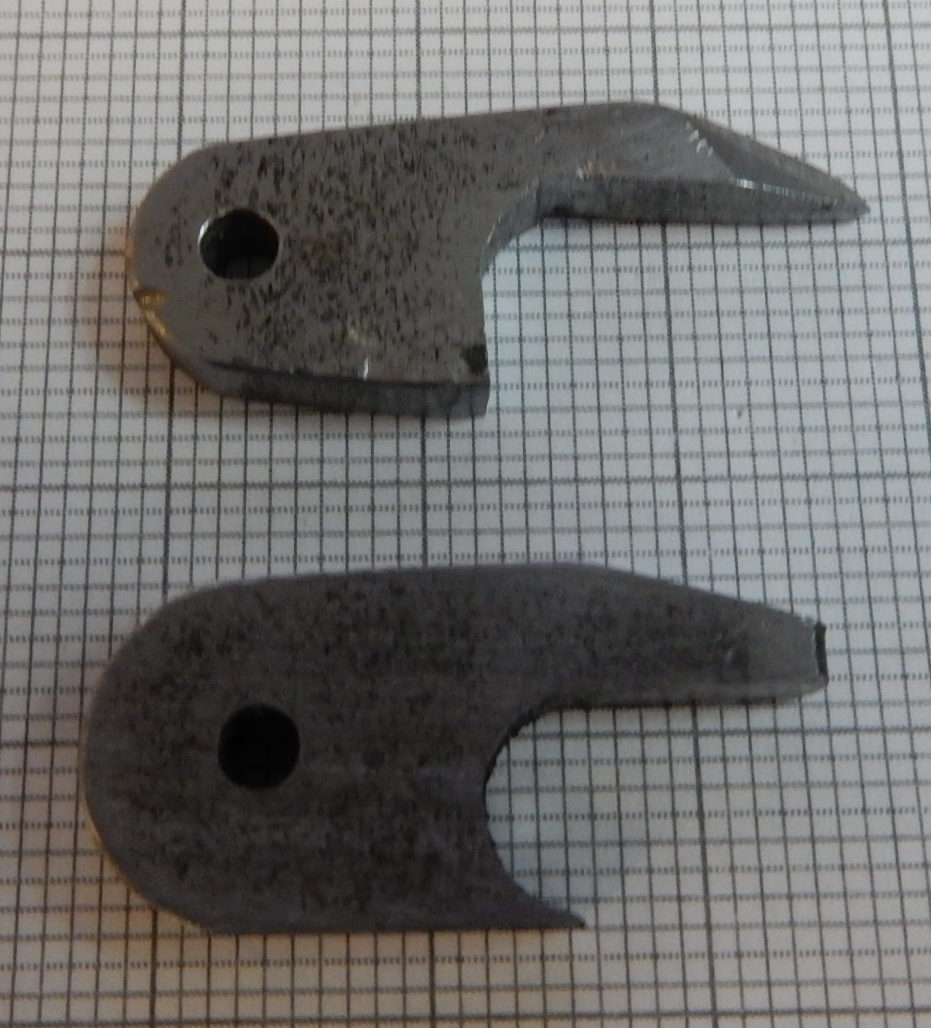
The plans call for square tubing for mounting the wings, but you guessed it, not available in the size I want, not even close. Here I have to deviate from the plans and make something that will look the same, but is something I can make. At stations 31 and 51 I added the normal tubing cross bracing. Then I made some solid steel supports that look like the original. I use short pieces of steel. Later I will put a false ‘square’ cover over the visible bits in the cockpit area.
I’ve always been reluctant to start milling steel, but actually, if you take it slow, it goes quite well! (surprising myself here.) This stuff is plain cheap ironbar, I will have to try stainless steel as well, but that is probably a different game. Time will tell. (Note to self: This was done with a 2 mm bit, @300 mm/min, 0,1mm layers. Probably can go larger on the layers, but I need to do something about cooling, since WD40 is not that great as cooling liquid.) Looking at the parts you see that the toolbit vibrates, it creates an uneven surface. However, using a 2 mm bit is really pushing things. I will need to study this subject a bit more!
While I was at it, I also made the support for the LG-front attachment point. By using 2 mm parts I get enough strength, and I can easily cover the gap between the supports with a 0.2mm strip. The rears support consists of triangular gussets. Again a milled part will be the real support, gussets will/ might be added to make it look nice.