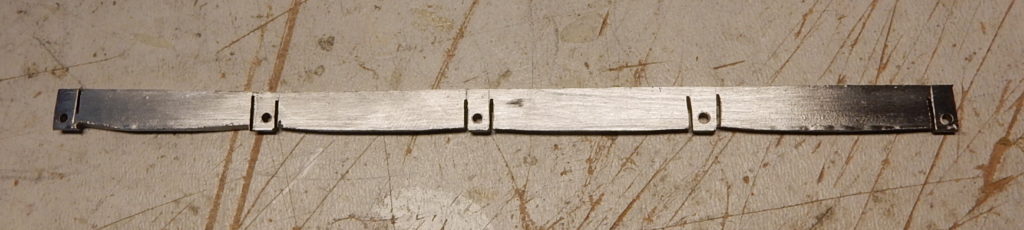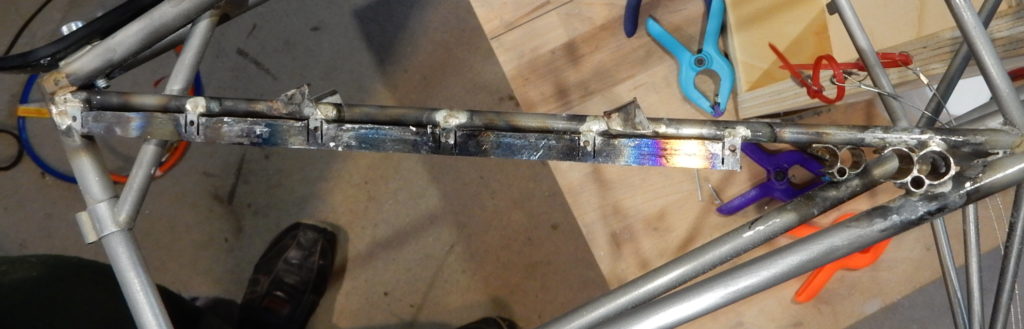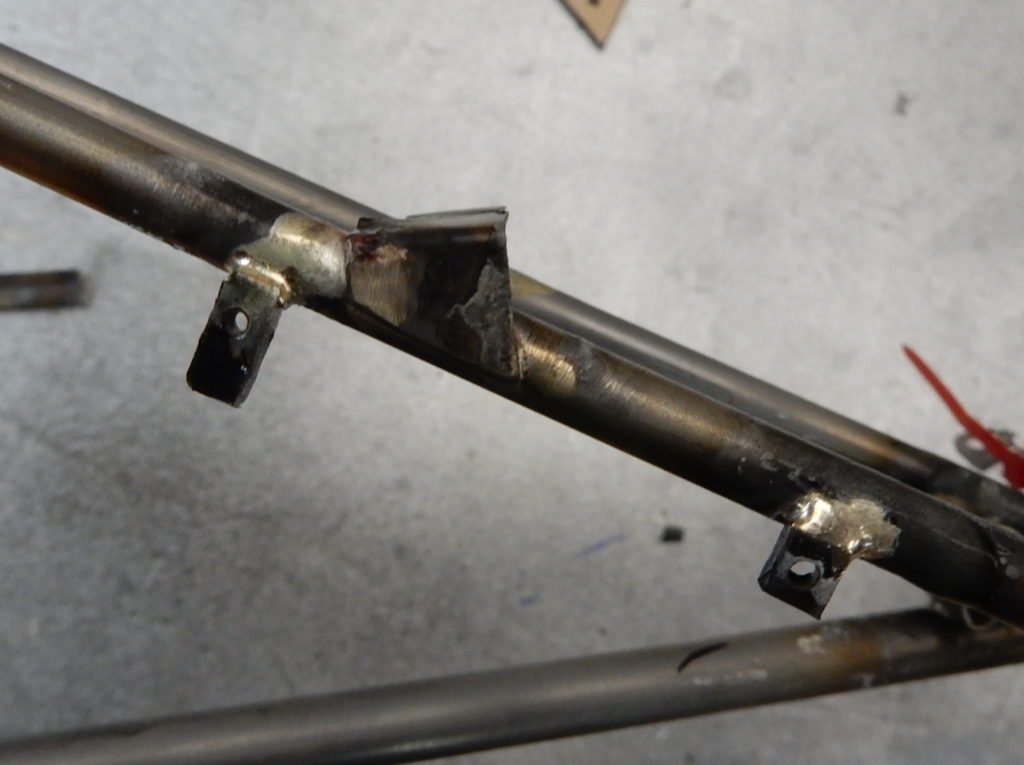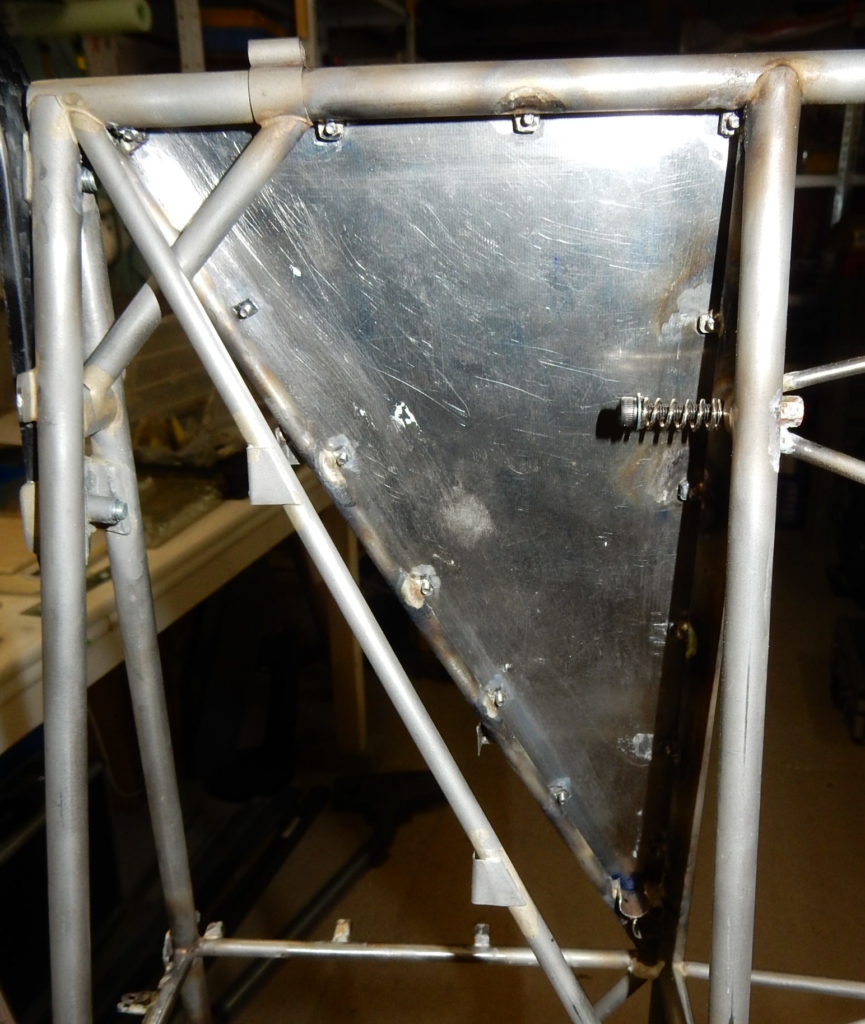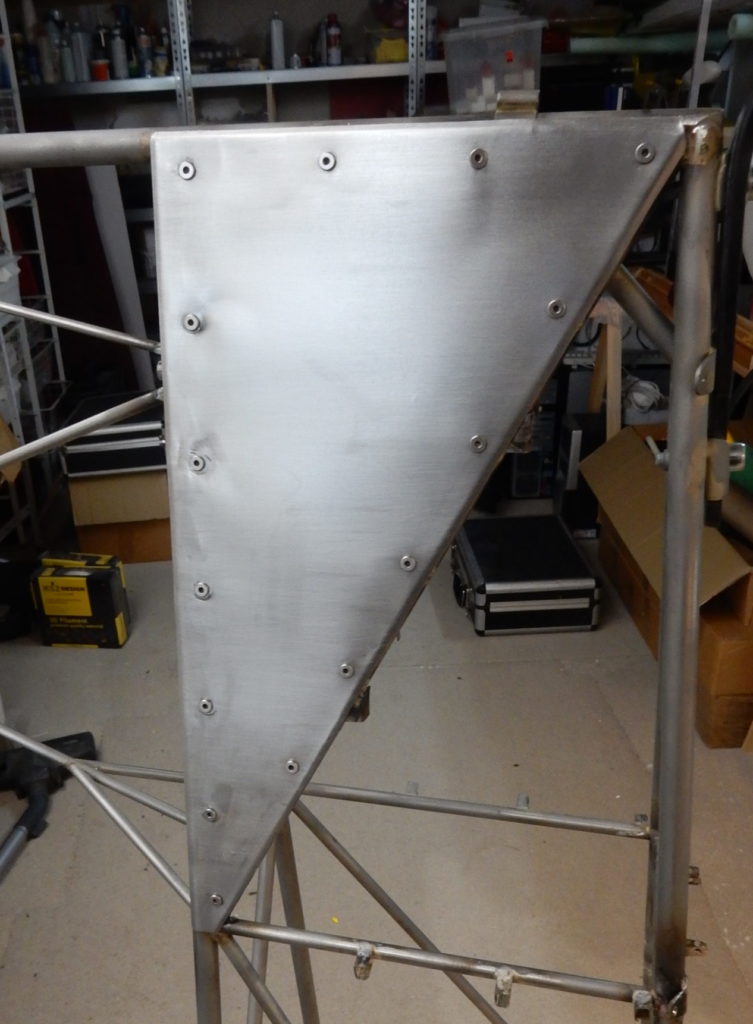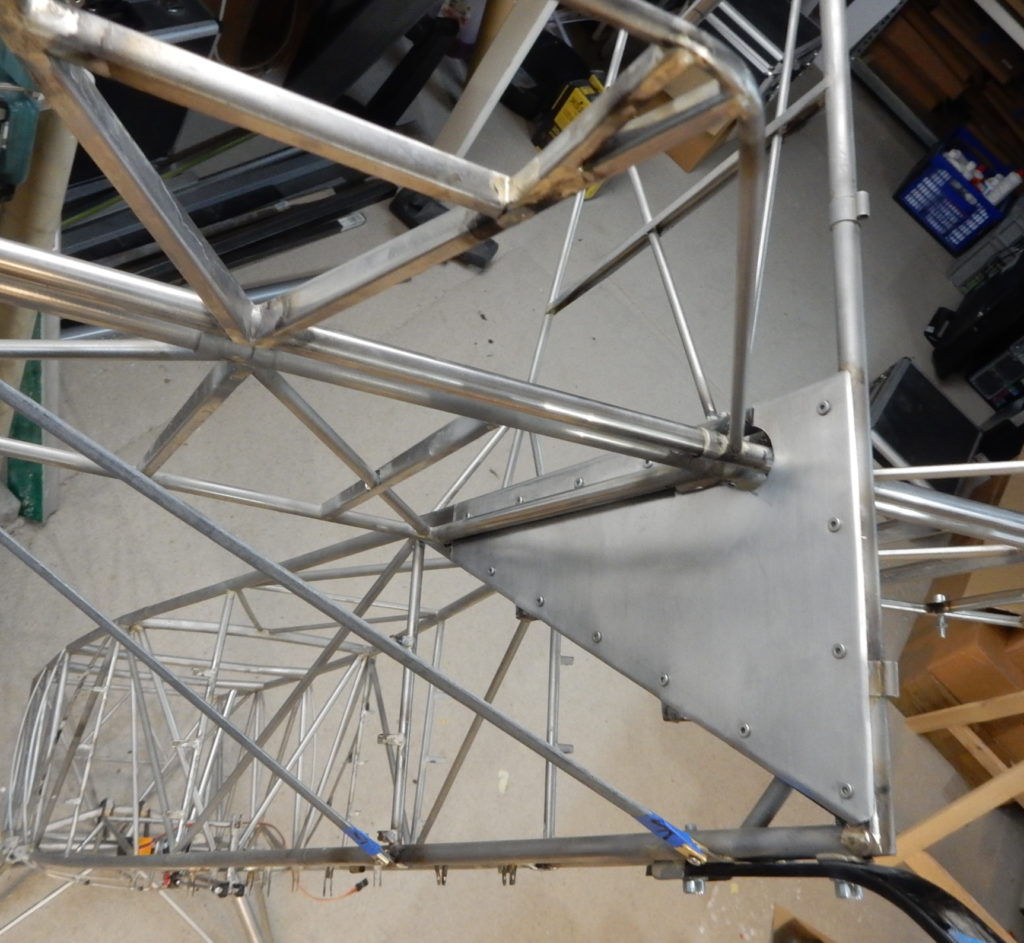
The panels for the access to the rear end are made from 0.3 mm stainless steel. The main challenge was working out a method to fit the panels with screws as per full size. After the inevitable ”not fit for use” parts, I think I worked out a method that I can use at the front as well, without adding too much weight. I am using 2 mm steel strip, partly drilled and cut at the locations I want to keep. I use the panel for alignment, and when the first 2 point are soldered, I remove the panel and solder the remainder. Afterwards I cut of the bits no longer needed. Once the lugs are prepared, they are tapped with 2 mm. At present I am still working on the cutout for elevator, but already it looks great.
In hindsight I should not have followed the plans for locating the tabs. It would have been better to place one or 2 at different locations, i.e. I now need to add 2 extra to hold the front part of the cover and an additional one to hold a filler plate above the hole for the stab. Hey, it’s a Homebuilt!